**Some links may be affiliate links. This simply means that at no extra cost to you, I may receive a very small commission if you purchase an item.**
We have played musical bedrooms over the summer. At the time, I was about 6 months pregnant with Baby #2, and we wanted to try to move our three year old son Drew to his “big boy” room sooner rather than later. The room I wanted him to have was currently the guest room, so we shifted everything to the right. I gave up my craft room, and we moved the guest room over one too.
We asked Drew what he wanted his room to be, and he chose cars! I’ll admit, I was really rooting for a dinosaur room, but I was quickly turned down.
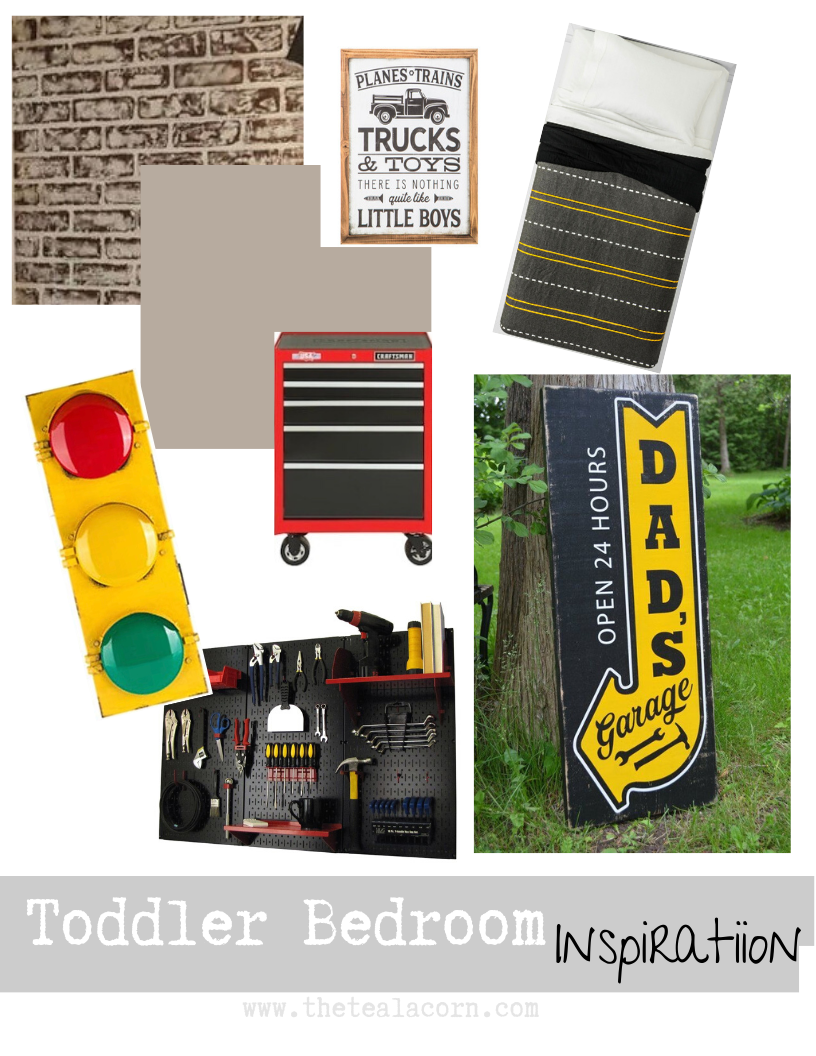
Here is the design board I created for the look and feel of Drew’s room.

I wanted it to be super toddler friendly, but to also have some cool design elements. We found a cool bedding set, and I had some neat ideas for the dresser, but I wasn’t feeing like my plan was complete. I was debating a painted print accent wall, but I could not find ideas that loved. BUT THEN… the idea of a faux brick wall came into my mind, and I was ready to go!
First, we painted all the walls but the soon-to-be-brick-wall in Perfect Greige from Sherwin-Williams. It is my go to neutral! Next, we picked up some faux brick panels from Lowe’s. We installed them by simply using our nail gun and shooting a whole mess of nails through each panel. We didn’t want to glue them so that if we want to change it down the road, it’ll just be some (ok a lot) of drywall patching.
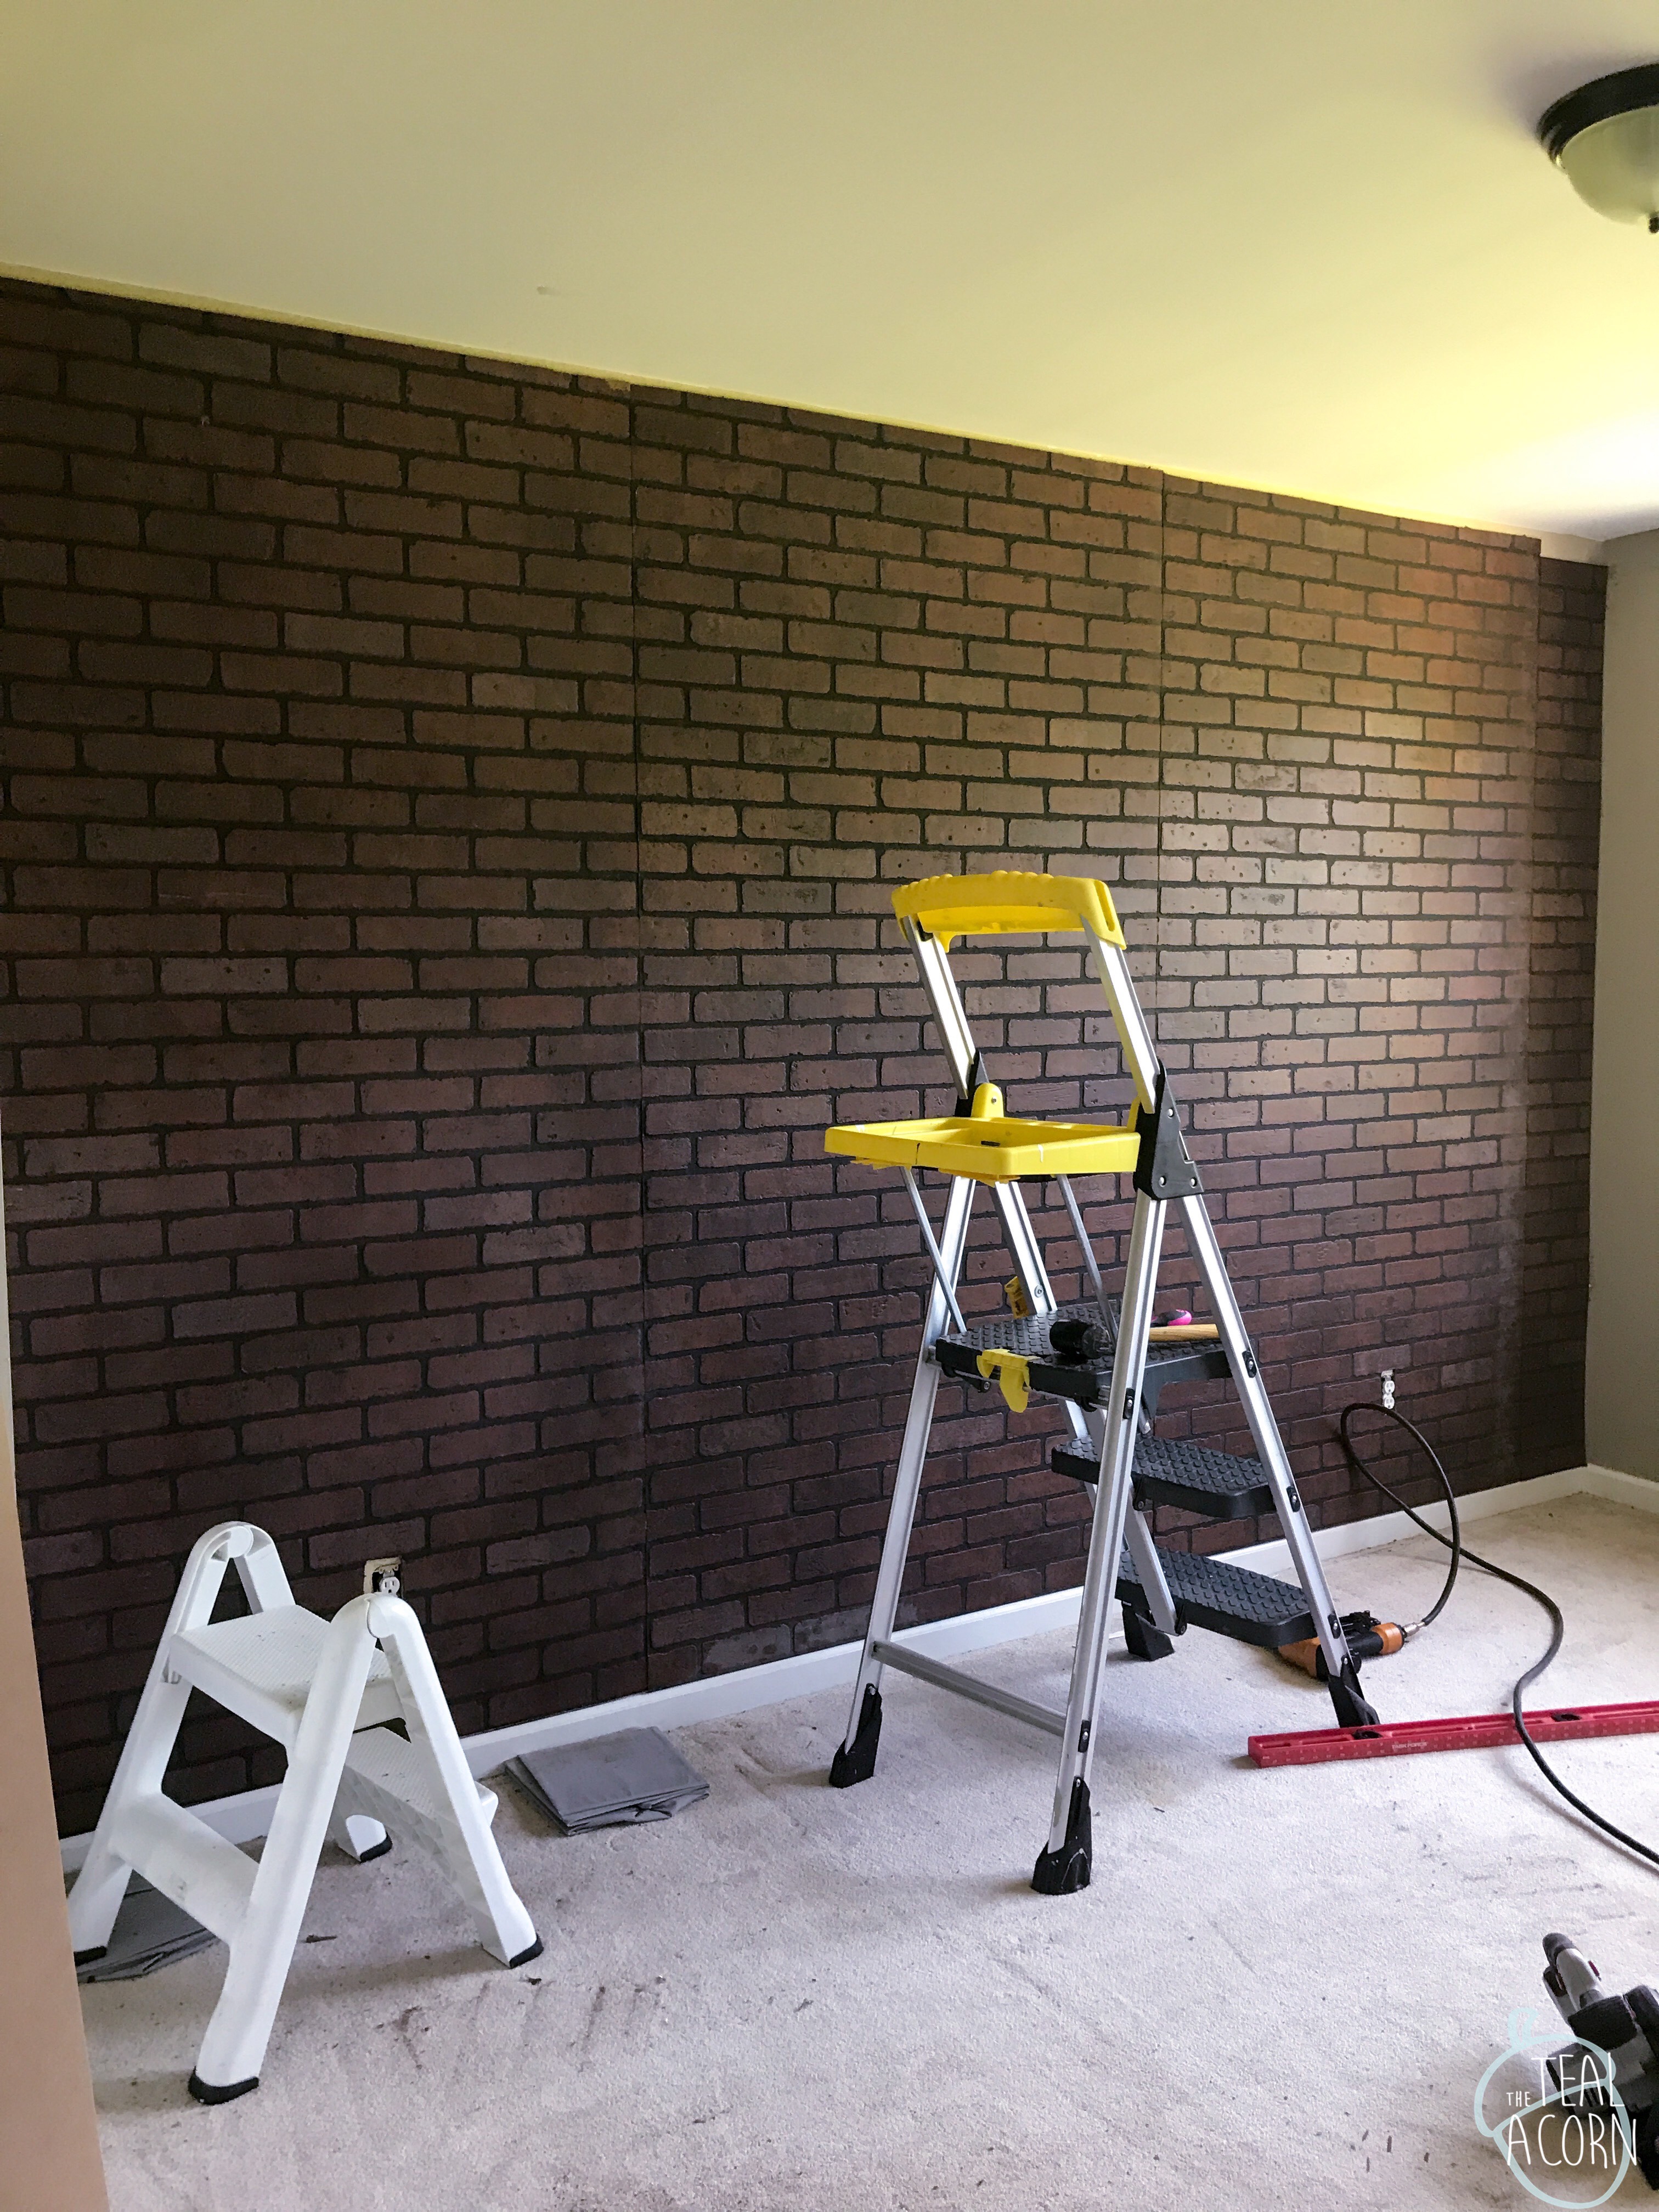
In fact, during the process, we took a panel down to fix how the panels were aligned. It wasn’t bad, so that was an encouraging thought to have in the back of my mind in case teenage Drew no longer loves the brick wall.
But speaking of aligning the panels… learn from our mistake. Not all of the panels are cut to match up with one another. Three out of our four were the same, but the one that didn’t match was very obvious when we lined it up. If you look at the picture I posted above, you can see where we cut a few inches off to get panel lined up. We ended up getting a piece of shiplap from Lowe’s to create a faux beam/rustic crown molding kinda look. If I were to do this again, I would check the panels in store.
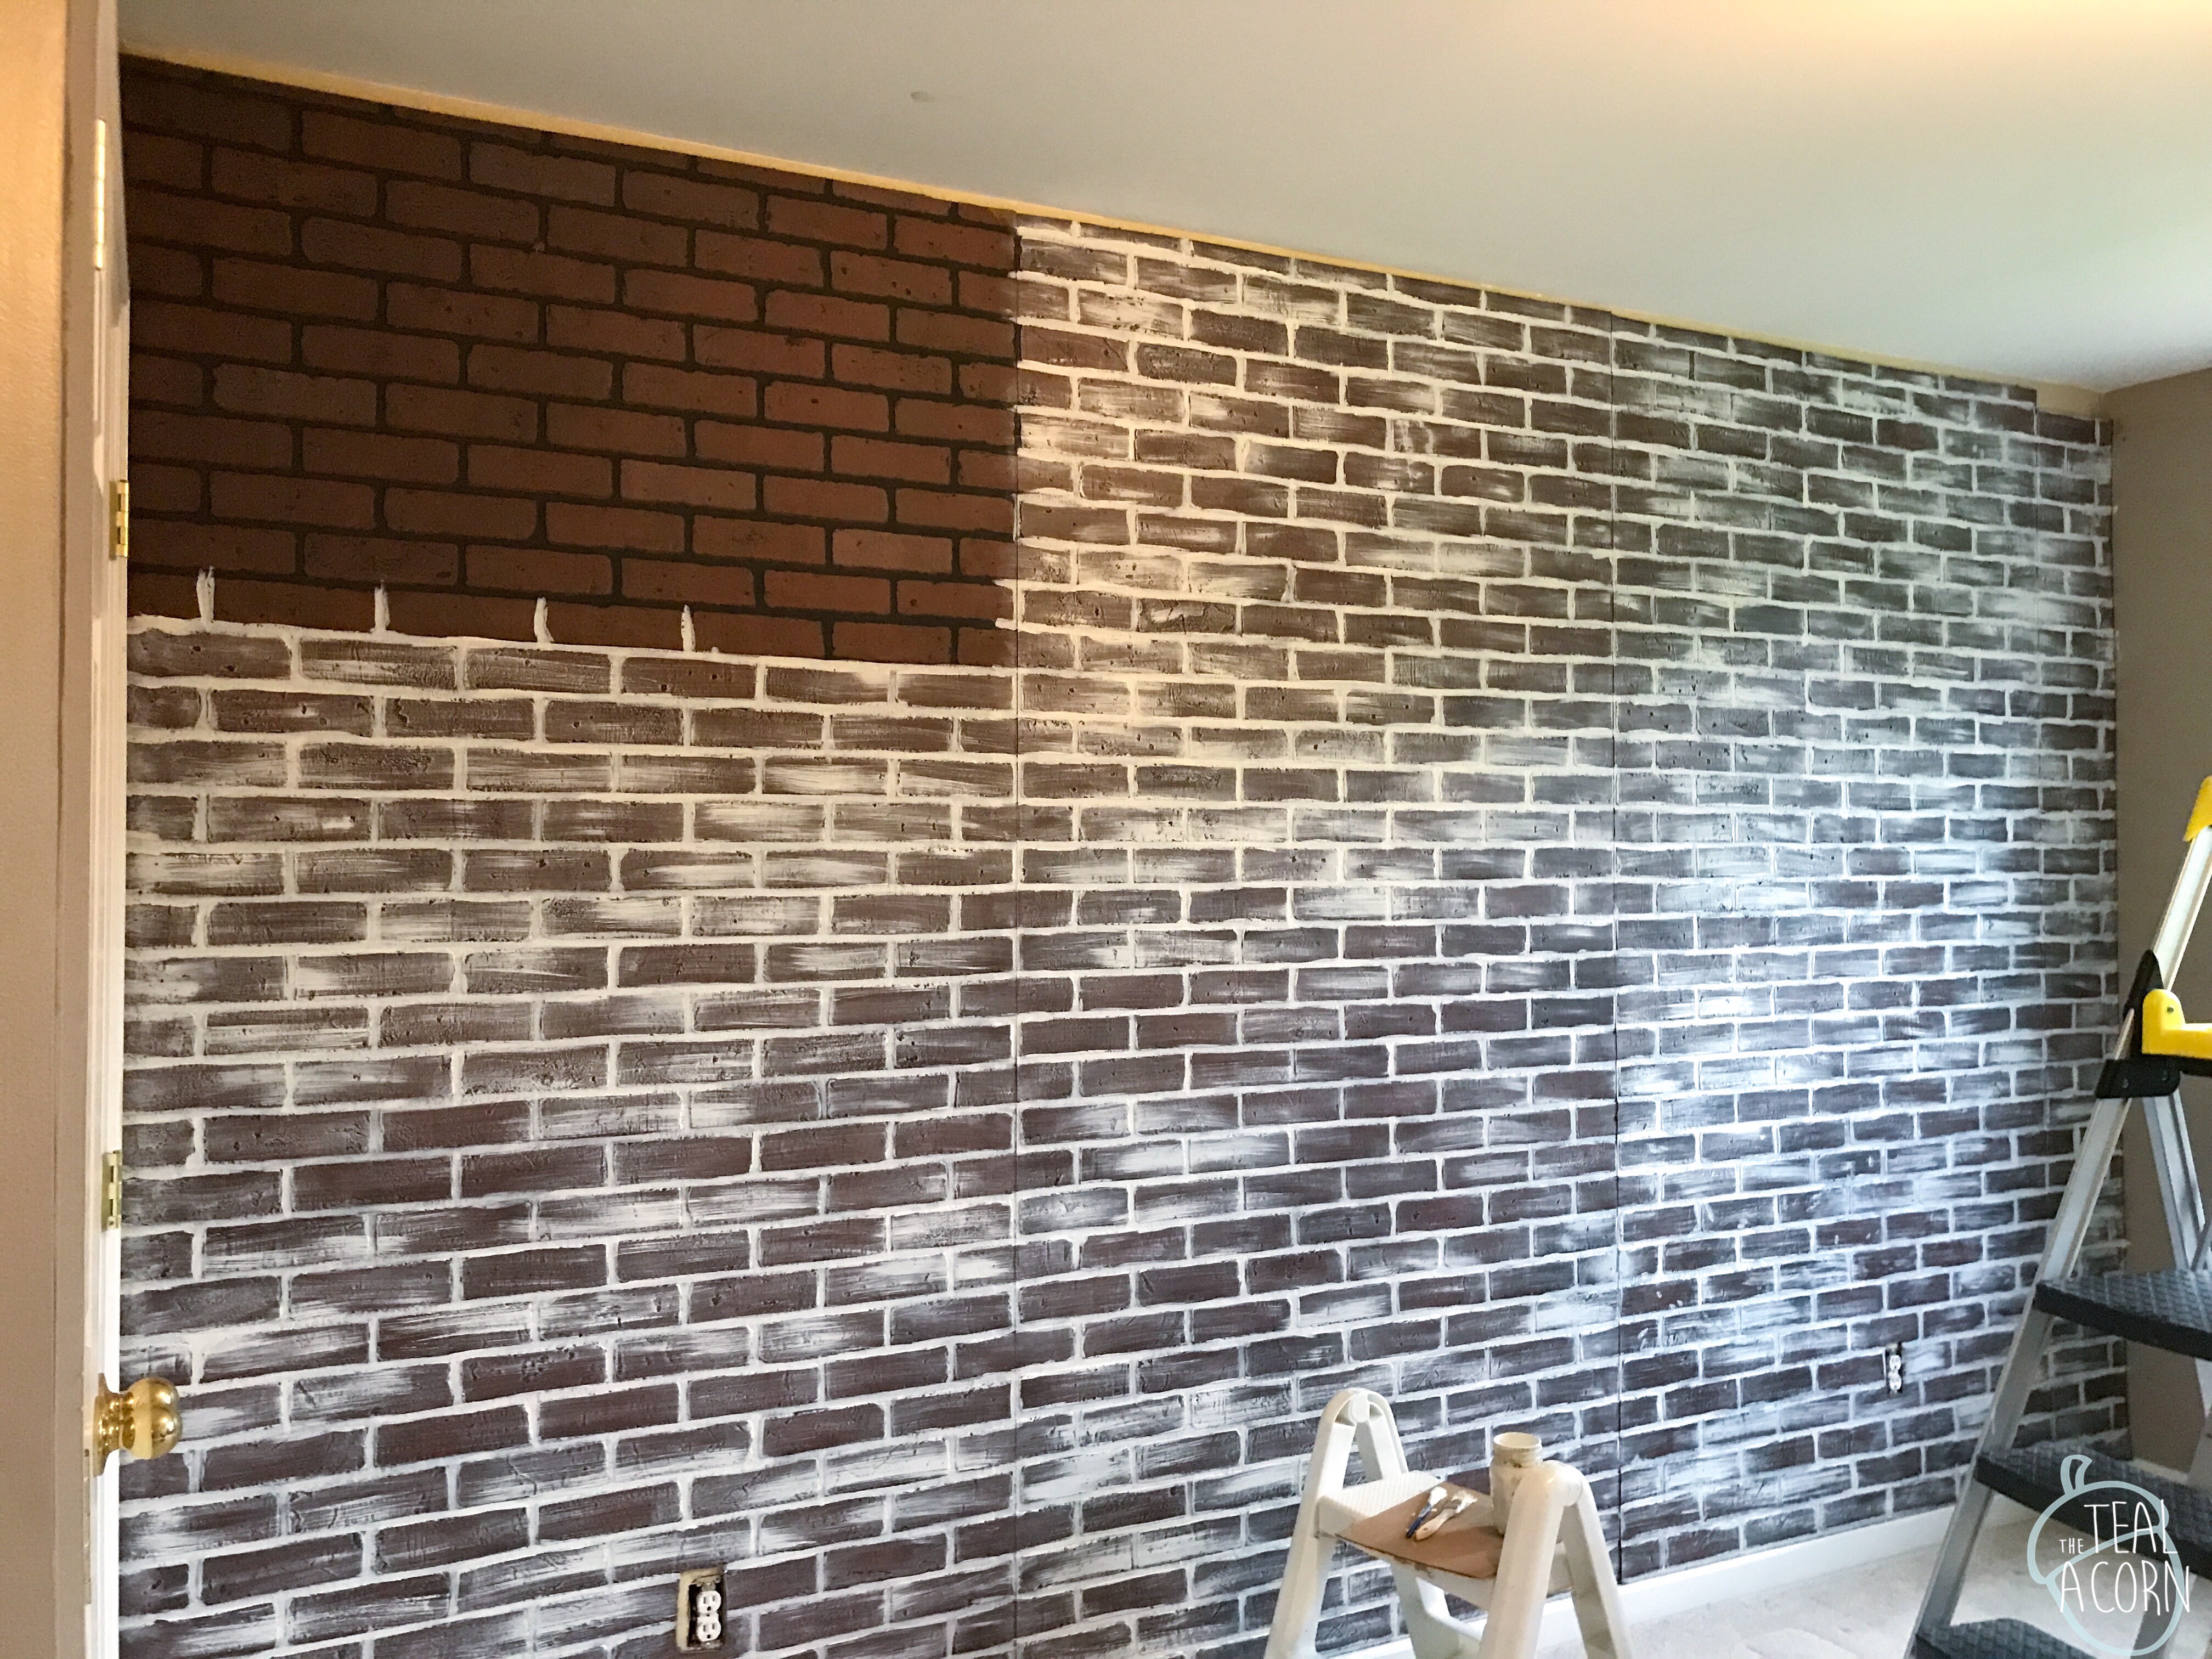
I wanted the bricks to have a German schmear look. I created it with a little bit of white paint and a scraggly paint brush!
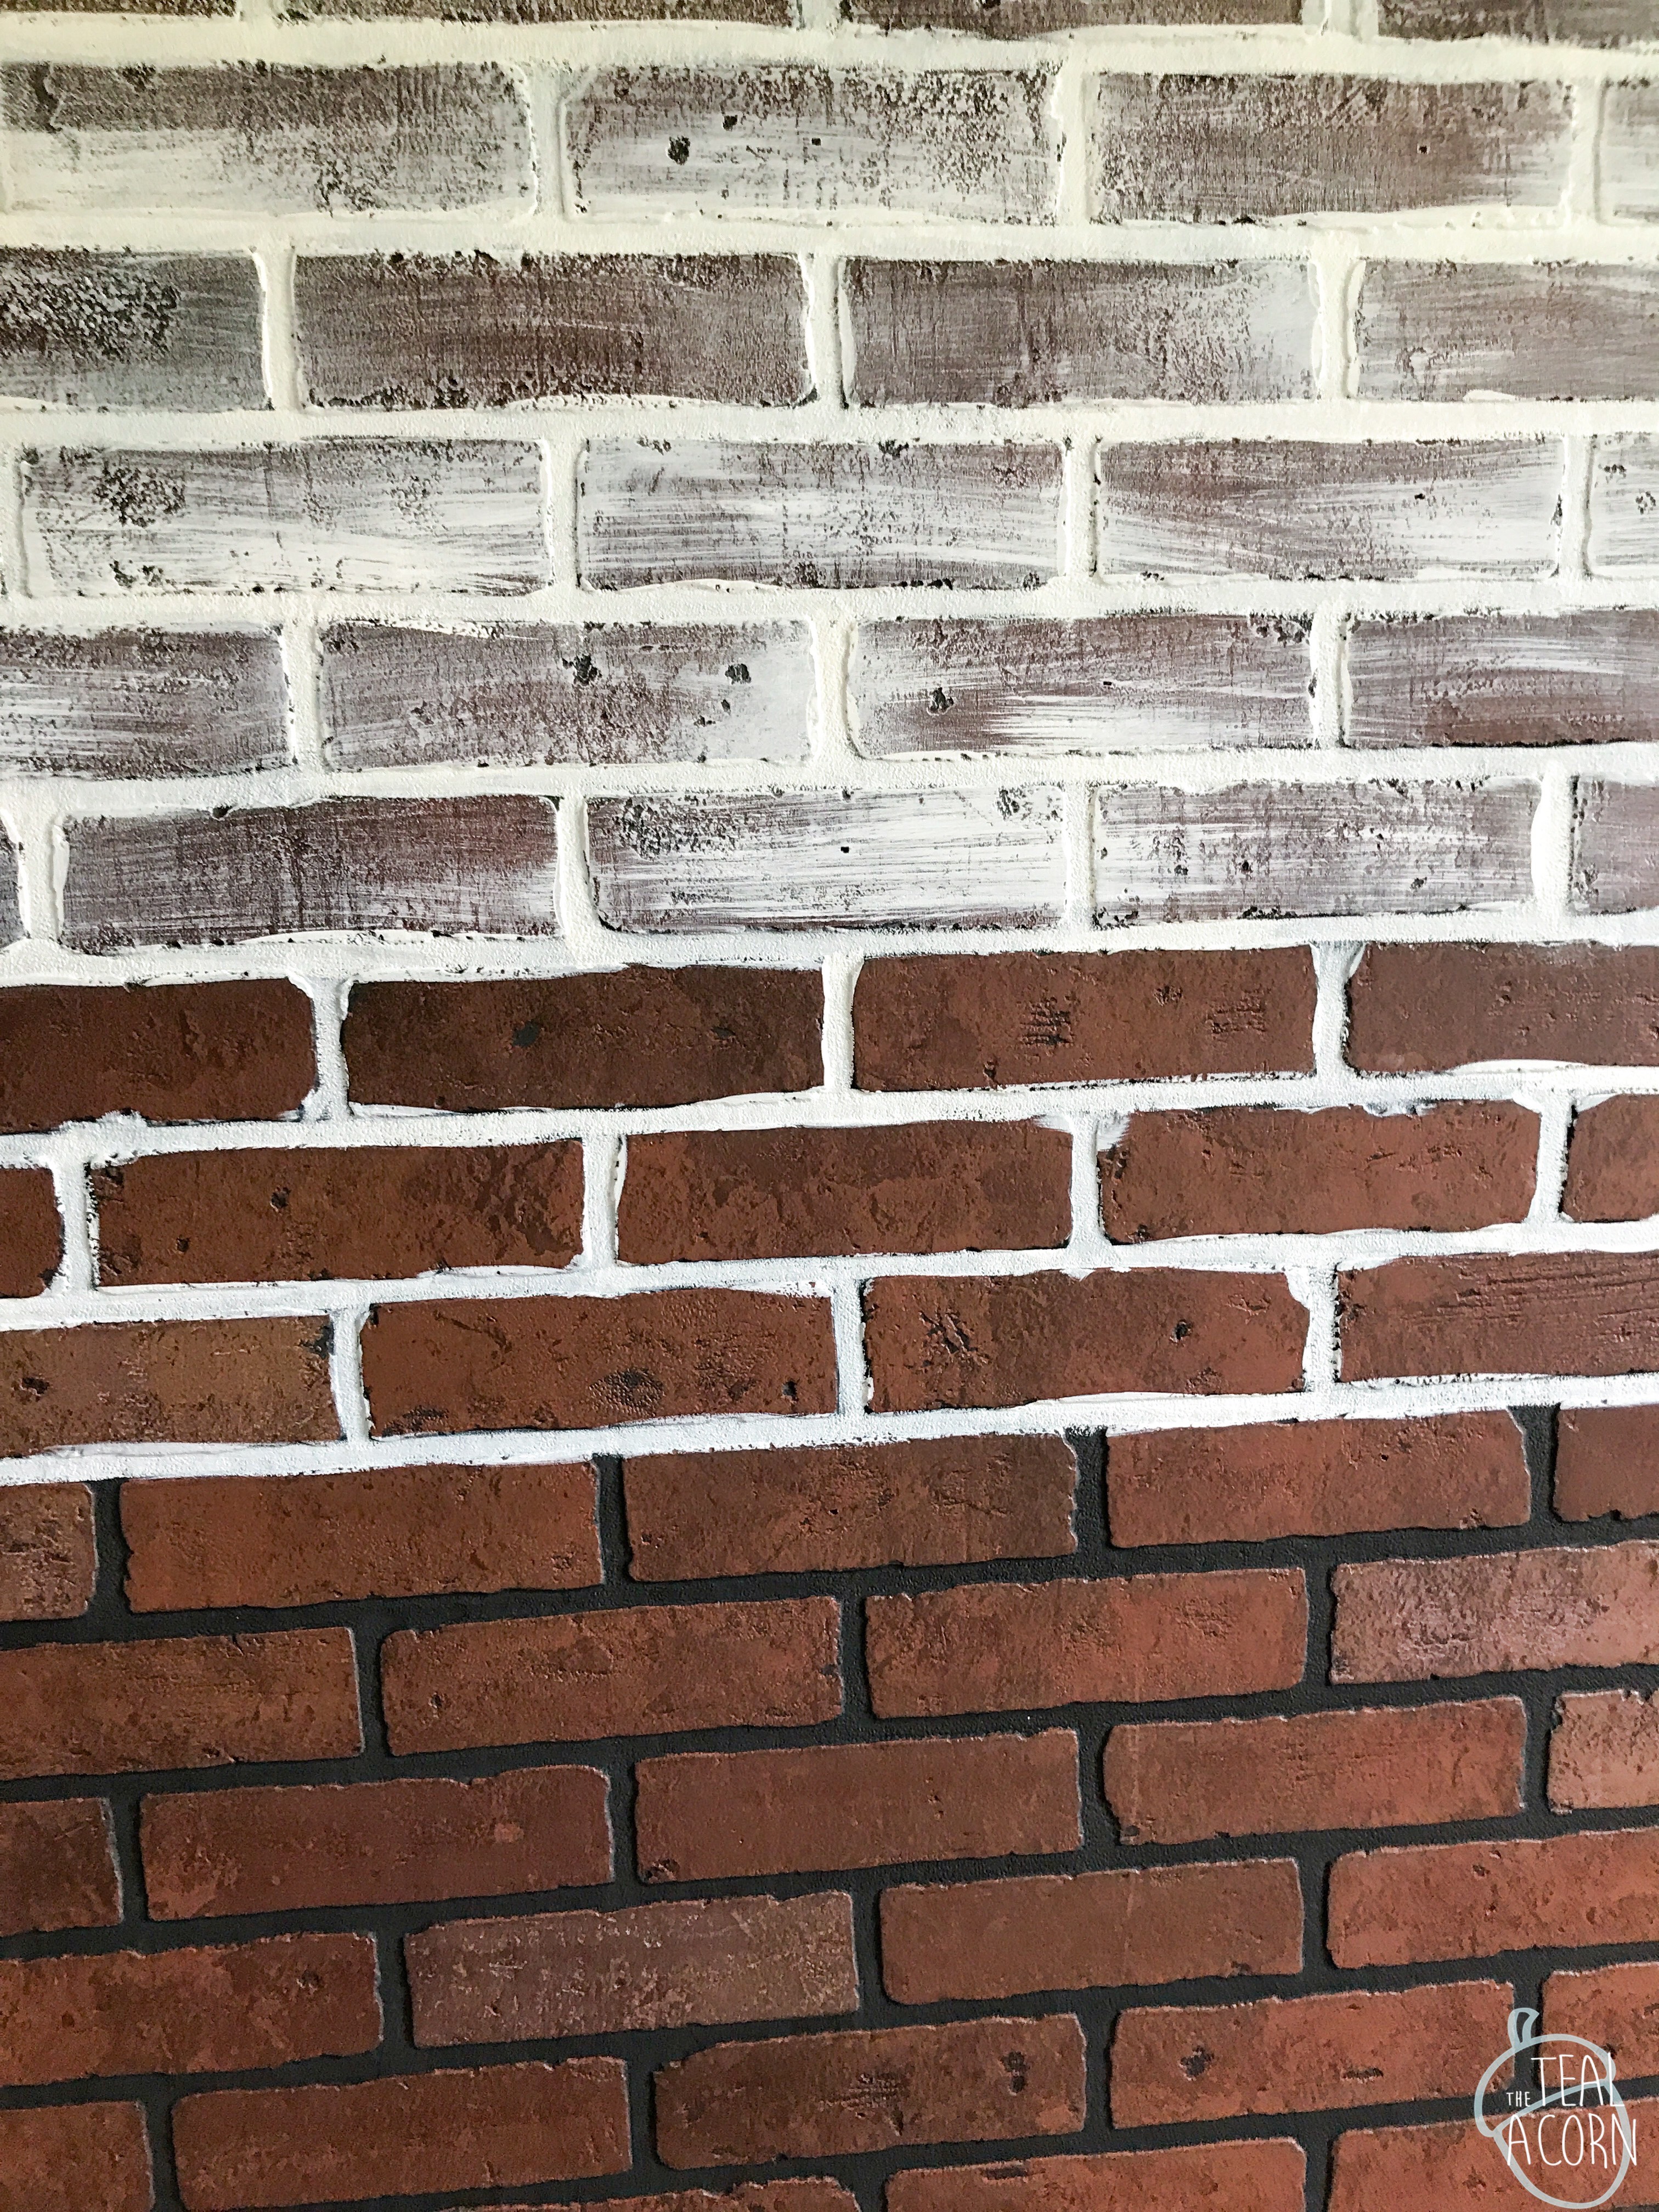
I started by painting the black “grout” white. Then I went back over the brick and dry brushed it white. You can see when looking at the entire wall that I went heavier in some areas than others. It didn’t need to be perfect or uniform throughout- I wanted it to have some character.
On the opposite wall, I wanted to create a gallery wall with some cool signs I picked up at Hobby Lobby. I wanted to create it on a peg board to tie in the car theme a little more. To do that, I hung some 1x2s on three studs in the area I wanted the peg board. I then attached the peg boards to them. Once they were hung, I painted them black.

Ta-da!

The signs were so fun to pick out, and we had a little symbolism for several of the men Drews life. A couple of the signs were actually Steve’s from his child hood room. The STP can was picked because my grandfather was a huge Richard Petty fan. Drew’s Pop has a mustang. His Poppa is a GM fan (the Chevy sign). One of Drews many nicknames from me is Bubba, so ‘Bubbas garage’ was a must! I’m still on the hunt for a Hess sign- Steve’s grandfather owned a Hess station. Once I track one down, the collection will be complete!


Speaking of family ties… Drew’s desk (and his bed!) is on the third generation. It was originally his Nana’s desk, then his dad’s, and now it’s his! We needed a chair, so we ordered this one from Walmart.com.

Could you create a car themed room for a little boy and not include a light up traffic light??

I found this one at Hobby Lobby, but it looks like they have the same one on Amazon if you don’t have a Hobby Lobby near you.

I used the same orange curtains from Drew’s nursery. I found them on clearance at Target when I was pregnant with him. They have certainly served me well!
Drew’s bedding and little rug was another Target find. I thought the roads were super cute!
The lamps behind the chair and his bed are from Ikea, and they used to live in my craft room. That’s also where we pulled his 8-cube shelf from. As for the chair, it is actually white and was in the guest room. I ordered a slipcover off of amazon to make it fit the look of his room a little better (and let’s be real, to protect it!). A majority of what we used to furnish and decorate his room were all things we already owned. If you’re looking to redo a space, don’t feel like you have to spend a ton of money or buy all new things. Shop your house and see what you can use that you already have.

The dresser is probably my favorite part of the room! I took the dresser from the nursery for this makeover because i didn’t want to paint the one that matches the bed and desk.
The dresser was initially orange with teal knobs and bronze pulls. I painted the body of the dresser with Fusion Mineral Paint in York Red. The drawer fronts were painted with Fusion’s Midnight Blue. I added some shiny chrome pulls and knobs that I picked out at Lowe’s. I found the crowning piece, the Craftsman nameplate, from Amazon. I simply attached it using hot glue.

I’m so in love with how it all came together! When we first finished it, Steve and I were trying to convince Drew to swap us rooms, but we had no luck!
