I’m finally sharing with you a project that I completed almost a year ago. It’s something that I have been using everyday since then!

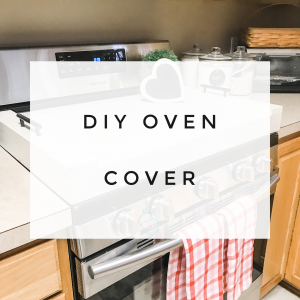
It’s my noodle board oven cover!
I have a gas stove that I love for cooking, but I hate cleaning it. It never seemed to fail that as soon as I wiped it up and put all the burners back in place, I’d knock over some salt or spill some sugar, or some other little granular like substance. I swear, it’d get dirtier when I wasn’t using it than when I was actually cooking!
Another reason that inspired me to make it when I did last year was an upcoming birthday party. I don’t have a ton of counter space in my kitchen, and I thought that having this cover would help give me a little more room to spread out food for the party.

It worked perfectly to display the cake and desserts!
It was super easy to make and only took about an hour to put together. The longest part was figuring out the measurements. Here is a look at how I did it:
First, I took a look an some measurements of my stove.

I wanted it to sit on edges and slide under the “lip” at the back of the oven…


…like so …
Measuring those spots helped me figure out what sizes of wood I would need.

I purchased a 3″x1″x10′ board and cut it down to two 21.25″, two 20.5″ and one 30″ piece.
These would be all of the sides and the handle strips that you see in the photo above.
The larger piece of wood was cut down to size from a 2’x4′ board. I cut it down to 21.5″x28″. Basically, I just measured the stovetop and subtracted the width from the front, left, and right pieces.

The first pieces I put together were the “frame.” The side that didn’t get a framing piece is the side that would go against the back of the stove.

I did make a mistake when doing this part… The back side of the bigger board had a sticker mark and a couple of shallow splits that I wasn’t a fan of. I planned on making that side face the actual stovetop so it wouldn’t be seen… but after I put the pieces together, I realized that I had that piece upside down. Whoops! So if you too have a prettier side, double check before you start assembling!

To assemble, I just used a nail gun.

I flipped it over and attached the strips that the handles would be on, again just using the air nailer.

I marked where I wanted the handles and drilled some holes.


You can see here that the holes only went through the handle strip on top and the tray part on the bottom.

I finished up by filling the nail holes with some wood filler, used a white stain and sealed it with my favorite sealer, Minwax poly acrylic.
I love it! It’s made such a difference for additional counter space as well as keeping my stove top cleaner between uses.

I debated adding a design, but at Christmas I was happy that I had not. I used some peal and stick wall decals from Walmart to add some Christmas festiveness. SO easy and CUTE!
Overall, it’s been a great addition to our kitchen and I highly recommend giving this DIY a try!


Is your stove 22.5×30, with the height in the back 4″?
I’m not sure I can figure out the measurements for the wood.
Thanks for posting! It’s exactly what I’m needing.