Today I’m sharing how you can make your own Pottery Barn inspired lighted bats!

I love Pottery Barn style, especially when it comes to their holiday decor! However, I don’t love the prices… but I do love making my own versions for a fraction of the cost!
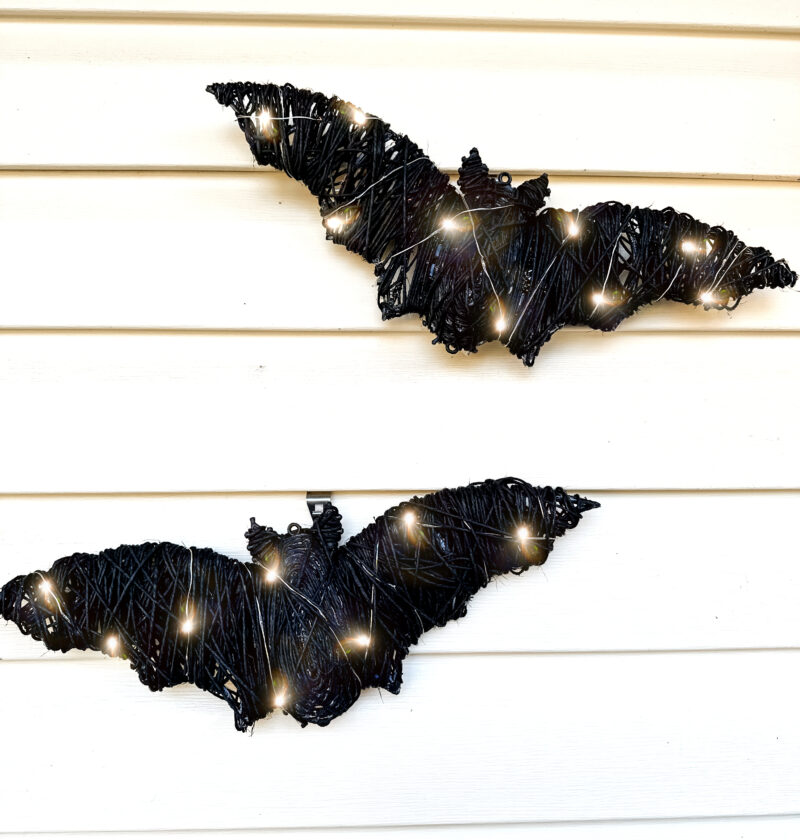
So today we are going to make these super cute bat decorations!

All it took was a bat shaped tinsel decoration from Dollar Tree, some black twine, and a battery pack of string lights. (And a glue gun!)

If you don’t have black twine, you could also use regular twine and spray paint it black.
To start, I pulled off all of the tinsel from the bat. The edges where it was glued was the only “hard” part- most of the tinsel was on some plastic panels that were easier to remove.

Most of the tinsel was around these panels:

Then its all about wrapping the twine- I started on one wing and worked my way towards the center body. I did wrap mine more densely than what the original Pottery Barn bat was because I wanted to hid the plastic frame.


Once I got to the body, I wrapped and glued the twin around in an oval to cover all of the plastic.

I still wrapped twine overtop the oval-wrapped part so that it blended with the wings.

After wrapping the entire bat, I didn’t cut the twine quite yet- I wrapped the string lights around first.

Then, I wrapped the twin overtop of the lights as well so that they all blended together.

I used the hollow well in the back to store the battery pack for the lights. The twine helped create a little pocket for it.

I used one of these string lights per bat. These lights were great because they had a tier so I could set them up to turn on at dusk. Is there anything better than a self-sufficient cozy glow?

I hung mine to our vinyl siding using these cool clips- no worries about a command hook falling off or leaving a sticky spot!

These turned out so cute! Would you make these? Let’s chat in the comments!