Today I’m going to share how I made these cute little rope ghost pillows!

I made two for the rocking chairs on the front porch. For each pillow I grabbed a $5 pillow from Target’s Dollar Spot, white rope from Dollar Tree, and small scrap of black vinyl… and my hot glue gun!


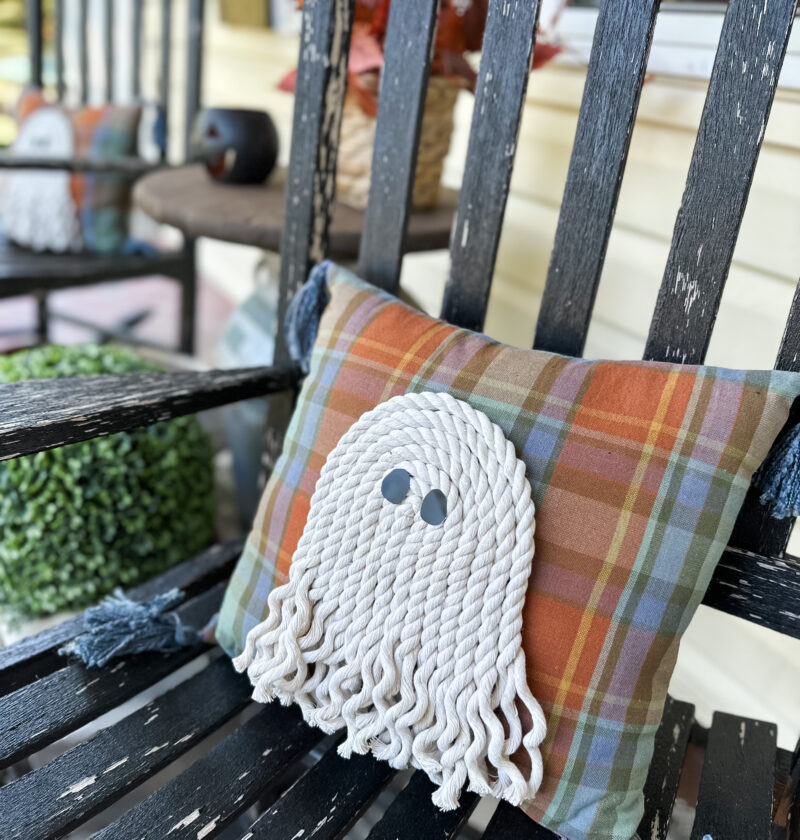
The ghost is essentially and upside down “U” or a pressed together rainbow. I started by gluing the very center of the ghost and built up layer by layer from there. Because I wanted to unravel the bottom of the ghost, I did not glue and of the top on the bottom 3-4 inches.


I also did some spots of glue to glue the ropes to one another, in addition to the pillow.

This is what it looked like by the time I was done. It took one Dollar Tree rope to make one ghost.

I wanted the bottom to be unraveled, so I did not glue them to the pillow. Once the rest was in place, I went through and unraveled each rope.

This is what that looked like when I was done:

For the eyes, you could use a few different things, like fabric, felt, or even paint. I used what I had handy, which was black vinyl. I didn’t use the vinyl adhesive to attach it; with he pillows being outside, I thought they would fall off so I glues them on.

Here is my little boo thing!


I just think they’re so cute! I’m so happy with how they turned out.
Some things to note- these sit on a covered porch. I did not use outdoor pillows, but I often don’t on these chairs. I mostly use various Dollar Spot pillows. Occasionally, I have had to toss pillows but overall they hold up very well on the porch.
I think these have been my favorite Halloween project! I’d love to hear what you think- let’s chat in the comments!