
Today I’ll be sharing how I made over a dated wardrobe. This has been the most intensive furniture flip that I’ve ever done. Typically, I would simply change a paint or stain color and swap out the hardware. For this flip, I deconstructed and totally changed the shape of the piece. So let’s get into it!

We are slowly swapping out pieces of our bedroom matchy-matchy primary bedroom suite for a more collected and organic look.
The first piece we have found is this wardrobe that Steve spotted when we were shopping at a local second hand furniture store.

Honestly, I was not a fan. There was just SO. MUCH. GOING. ON. Tons of big, bulky details that I just didn’t like and had a hard time seeing past. But, Steve really liked the storage and thought it would be perfect. We ended up getting g it and taking it home.
One of the first things I did was start working on the doors.

They ended up being way easier than I anticipated. I was able to unscrew the solid back panel from the I side of the door. In doing that, I was able to pop the lattice details off super easily. The trickiest part was cutting the “I” shape out. I did so my using my jigsaw. It was mainly tricky because I was removing the bill of the wood and leaving a smaller frame, so the doors were jumping around quite. Steve helped hold the pieces down and we got it done.
Once I added back in the solid back panels, there was still a gap from where the lattice had been plus some not very straight cut lines. I used these trim princess from Lowe’s to fill the space and clean them up.

I removed the backing again and used some zip ties to help “clamp” them in place while the glue I used to hold them in place dried. I had cut them to meet at 45 degree angles in the corners.

I replaced the backing and used caulk to make it all seamless. Once the doors were painted, it really looked great!
Something I had not originally planned on doing was removing the top. But it turned out it could be removed simply by taking out some screws. There was a spot the was glued that required some maneuvering but overall it was an easy change.

Removing the top left some of braces that held the original top exposed. I wanted to create an even top, so I used a three 1×6 boards to finish off the top. I attached the sides with glue and clamped them to the side until they were secured. The front piece was screwed in place. I used the same trim that I used on the doors to add a little somethin’ somethin’ to the top.
Finally, we arrive at the drawers. I initially I was planning on leaving the drawers as is, but ultimately I decided I wanted a smoother look and pulled off all the trim.

Then I used wood glue to attach a 1×8 board on the drawer front to create a smooth drawer front. I also added a thin trim piece to the top so that each drawer had a little lip. I added some of the trim I used on the doors and top piece underneath of that lip too.
I had to drill new holes for the hardware. This is the hardware I used:


I found mine at Home Depot, but I don’t think they are currently carrying it. However, I was able to find them on Wayfair though!
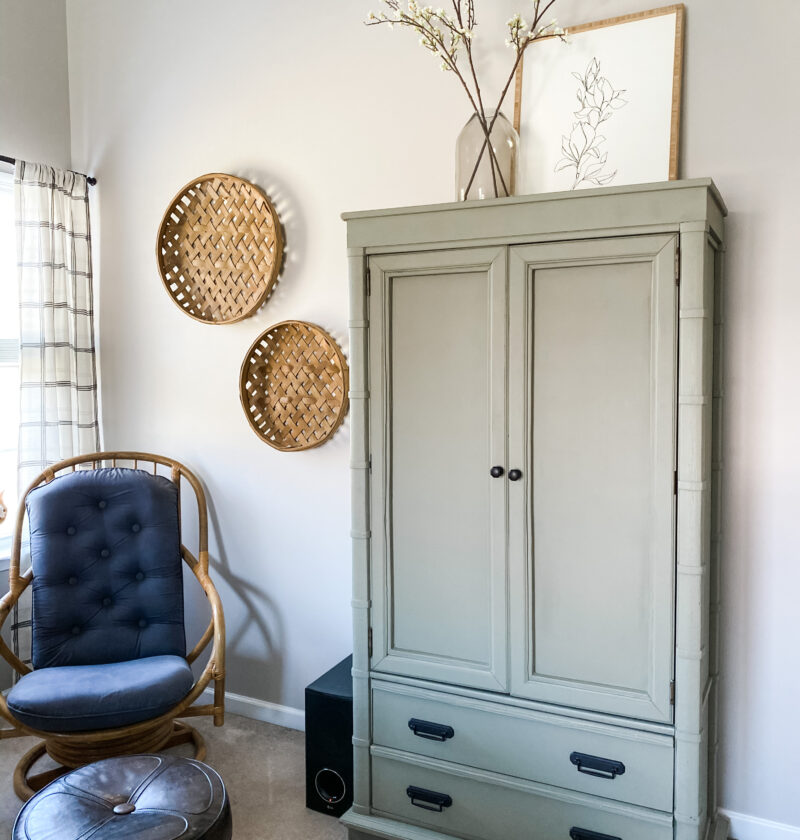
Let’s not forget to the fun part in my opinion: the paint! For this project I wanted a color but I wanted it to be able to blend into however I decorate our room. I ended up choosing Lichen from Fusion Mineral Paints.

I had used it on our bathroom cabinets and really loved both the color and durability. It’s such a beautiful shade of green with hints of grey to it. If you’re looking for a neutral color- this is it!


I hope you enjoyed seeing the process of how I updated a dated wardrobe. I’d love to hear what you think in the comments!


If you’d prefer to watch any of this in video form, check out my IG highlight that shows how I updated this dated wardrobe!
[…] How I Made Over A Dated Wardrobe […]